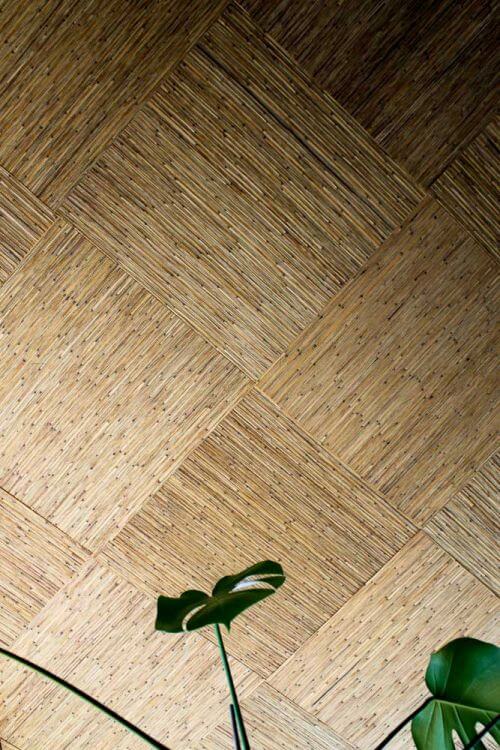
 All five portions of the ceilings in the Mahalo Lounge are now done! My wallpaperer Sally came over last week, and over the course of three days — she counted 14.5 hours of work for her — so that’s 29 hours working together — we finished the last two sections. The ceilings look fantastic — my husband — an awesome critic — adores them!
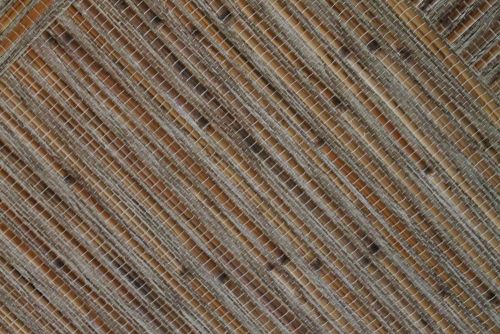
The grasscloth is not really grasscloth in the sense I typically understand. The material is quite heavy — those are real pieces of bamboo woven into cloth along with some other sort of raffia or raffia-like material, all adhered to a paper backing. I am not expert enough to know what all the stuff is, but it’s awesome. Photo viewing tip: On a desktop computer, once the page has fully loaded, click on any photo and it should enlarge on screen up to double in size (up to 1,000 pixels wide).
This was the THIRD material I purchased for the main ceiling, not even counting all the paint I bought to paint the ceilings a neutral goldtone while I figured out my plan of attack.
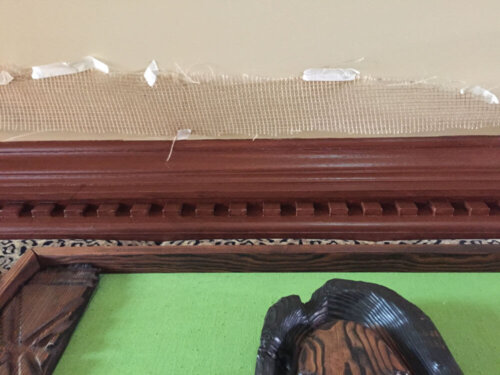
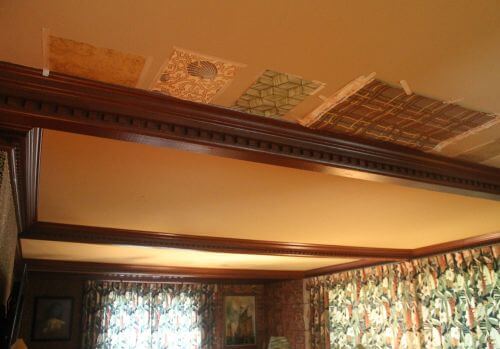 Ack. Do you remember the other ceiling contenders?
- First I thought I’d do cheap and cheerful open woven jute. Then a reader pointed out that jute stinks. I sniffed. Indeed. Ugh. I guess I’ll use it … to cover shrubs during the winter or some such outdoor activity.
- Then I thought I’d wallpaper. I asked you vote on my choices. Then I decided. I even bought the wallpaper — I brought Sally in to quote the job even! I really loved that Moby Dick wallpaper and think it would have looked quirky-great. (I am very pro: quirky.)
- But then… I went on the Grand LA Tiki Adventure and decided I needed more tiki, less chic. I saw the vintage grasscloth on ebay. There was lots. I thought it was a fantastic deal. No one bid against me. Once it was in my hot little hands, I knew it was the right choice.
- In due time, I started on the project. I got the first beamed section done all by myself two months ago. Then the holidays kicked in, and I always have a lot going on in my personal life too. Finally, in mid-January, Sally called and said she was finally available! Did I still need her help? Heck to the yeah I did!
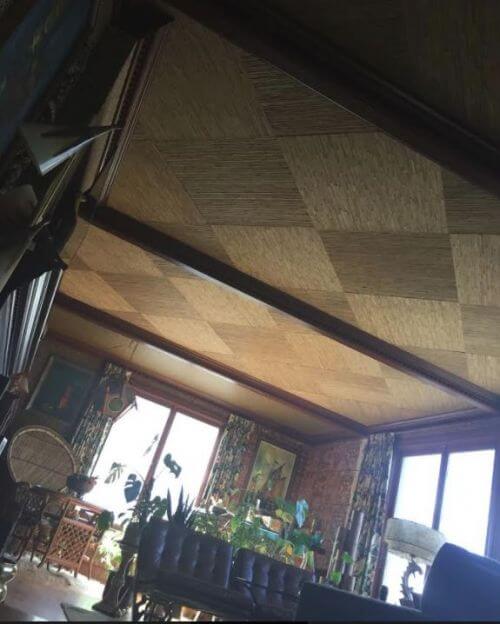 Above: The three beamed sections covered with the grasscloth — the first section is not much visible, it’s in the top right-hand corner of the photo. The open windows blew out the contrast in the photo, but I liked the moodiness of the photo. The way back section is vintage tooled gold vinyl. In the dining room (not visible) I used a different vintage wallpaper. Yes: Three different materials used on the five ceiling areas.
This was quite the job. Below: How I did it including all the products I used. Almost all the links are Amazon affiliate links — if ya click through and end up buying anything on Amazon, I earn a small commission. This is part of how I make my midcentury modest (I assure you I ain’t getting rich) living on the blog. I really did buy most everything from Amazon. I bought wallpaper size and paste locally, though — we had to keep going out for more!
My method:
- I literally can not imagine how I would have done this without my Louisville Ladder platform ladder. I have a wee bit of osteoporosis and an, ahem, wee bit of history falling and breaking things during tiki-related projects, so I was super careful how I used the ladder etc.
- Size the ceilings. I used this kind of size.
- Put up wallpaper liner. I used prepasted and saturated each piece in a wallpaper tray. I wore a vintage shower cap because golly, what a mess. Of course, I had moved all the furniture and stuff out from underneath and protected the floor. I used wallpaper liner because I thought that if I ever want to take the grasscloth down, it would be way easier to do if there was liner underneath. I put the wallpaper liner up in chunks — I did not worry about perfection because I knew the grasscloth was so thick you’d never see lines from the liner paper underneath.
- Size the wallpaper liner. I went through two gallons of size, ugh.
- Cut the grasscloth: The grasscloth came in 24′ rolls that were 36″ wide. The bamboo runs horizontally. I did not want the ceiling treatment to run in just one direction. I wanted “multidirectional.” So, I had my local glass shop make me a 34.5″ square template in a 3/8″ acrylic that I could use to cut equal-sized pieces that I could tesselate (install 90-degrees to each other.) As you can also see, I decided on a diamond install, rather than a squared-off checkerboard. Doing diamonds further increased the level of difficulty because we had to then create templates to ensure we cut the edge pieces as near perfectly as possible; there were differences because that diamond center piece was not always super perfectly placed.
- Note, over on Oceanic Arts’ website, they talk about the option to treat matting with flame retardants. If you are doing work with materials like this, this is an option for you to personally research so you can make informed decisions how to handle.
- I shopped for the most ergonomic razor blade cutting tool I could find. I am glad I did, because I had to grip hard and cut with strength to cut that grasscloth.
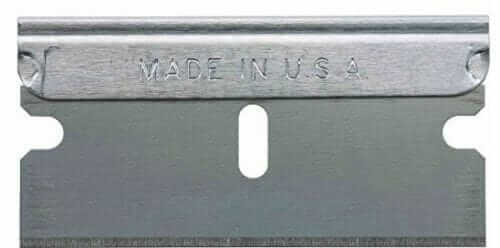
- I bought 100 name-brand, made-in-the-USA razor blades because I wanted some assurance of quality. I bought a lot because Sally had told me to change the blade often.
- I bought a second Olfa self-healing cutting mat. (I already owned one). I duck taped them together on the back side, then flipped them over and used them as a cutting mat.
- I cut squares. I used the razors to cut “along the grain” — that was easy peasy. To cut across the grain — including across those gnarly bamboo pieces — I first cut with the razor — which really only scored the stuff. Then I bent it back and cut for real with my Wiss Shop Scissors, which also were a life safer. Each beamed section included 22 cuttings. I estimate that, including errors, I cut about 80 squares. It was so hard.
- We put up the center square first — in a diamond way. To get center, I strung two pieces of yarn tight to opposite corner, then marked center. We then measured out in a bunch of directions to help ensure we could get the diamond points running north-south near to perfect as possible. Can you follow this?
- We pasted the grasscloth. I used heavy duty paste and a wallpaper brush. Sally used a roller. It took a lot of paste. The grasscloth, even cut down into squares, was heavy.
- I used a tee square, especially, at the beginning, to ensure I didn’t install anything crookedly.
- One the first beamed ceiling, which I did myself, I was pretty careful not to overlap. But in the few places it was necessary (if the line was not perfect because of my cut, for example), it actually kind of looked cool to have the dimension of the overlap. So on the second and third beamed areas, we did not worry about it so much and overlapped fairly liberally. I think that when a horizontal-running piece of bamboo overlaps, it looks particularly good.
- Putting up whole squares was pretty easy once you got that first piece up. Piecing in the edge pieces was more difficult because we had to make sure each one was cut to perfect size. To accomplish this, I used some flexible plastic packing material to make templates — I’d cut them into squares using the acrylic template, then tape them up to the ceiling using masking tape, then mark the cuts with a sharpie, then cut and check again. If the template fit, I’d then cut the paper. I’d check the fit of the paper before committing to paste. The paper was not easy to cut with scissors once it was pasted up, but we did do that a few times. We didn’t measure twice cut once. We measured, like, four times, cut once.
- Advil. Or — rum classics?
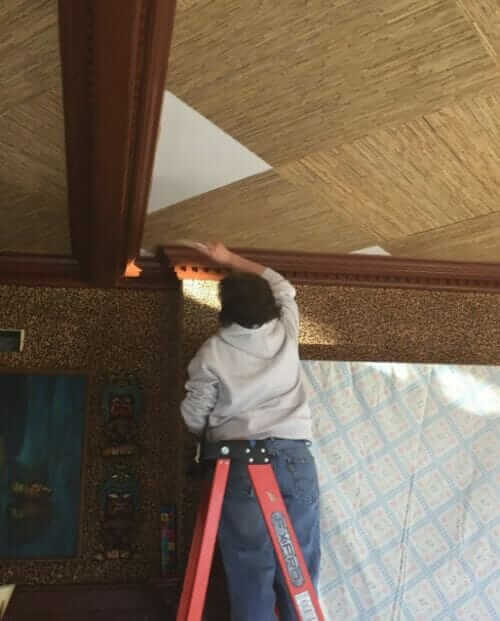 Sally, doing the last few bits. It was so much fun to work with her! I’m still in sneak peek mode — hence no big room shots yet. A few more things to complete — and then this room is done!
The post Bamboo grasscloth ceilings for the Mahalo Lounge: Probably my most labor-intensive (craziest) project ever! appeared first on Retro Renovation.
No comments:
Post a Comment